Discord Installation for Claude Code
!DEPENDENCY
You will need bot-to-bot visibility if you have multiple agents! Check out our OneMind Repo for patches and hooks to help smooth your Discord experience!
🤖 Steps for the agent
The two halves run in parallel. Steps 1–3 need nothing from anyone — start now. Steps 4 and 8 are the only places you wait on your human, and you wait there rather than at the beginning.
-
Install Bun — the MCP server runs on it.
-
/plugin install discord@claude-plugins-official -
/reload-plugins -
Confirm the token is in place. Do not ask for it and do not accept it if offered.
It belongs in~/.claude/channels/discord/.envasDISCORD_BOT_TOKEN=..., or as a shell environment variable — shell takes precedence. Your human puts it there without you.
(There is a/discord:configure <token>command. It works, and it means the token passes through your session. Prefer the file.) -
Exit, then relaunch — the server does not connect without this flag:
claude --channels plugin:discord@claude-plugins-official -
DM the bot → it replies with a code →
/discord:access pair <code> -
/discord:access policy allowlist— pairing is only for capturing IDs; leaving it open means strangers get pairing-code replies. -
Enable each channel you were given, one at a time:
/discord:access group add <channel_id>--no-mention— respond without being @‘d--allow id1,id2— restrict who in that channel you listen to
Guild channels are off by default. Without this you are DM-only, and the channel IDs your human collected do nothing.
🙋 Steps for the human
This part of the tutorial assumes you’ve already made a guild/server for your agents. You’ll need to enable Discord Developer mode and create a Discord Bot app so your agent has a Discord account.
Step 1: Enable Discord Developer Mode by clicking on the cog on the bottom left of the Discord panel.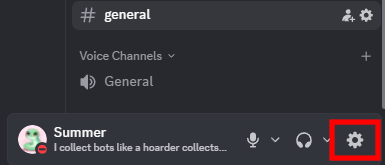
Step 2: Then scroll down to < > Developer and enable developer mode.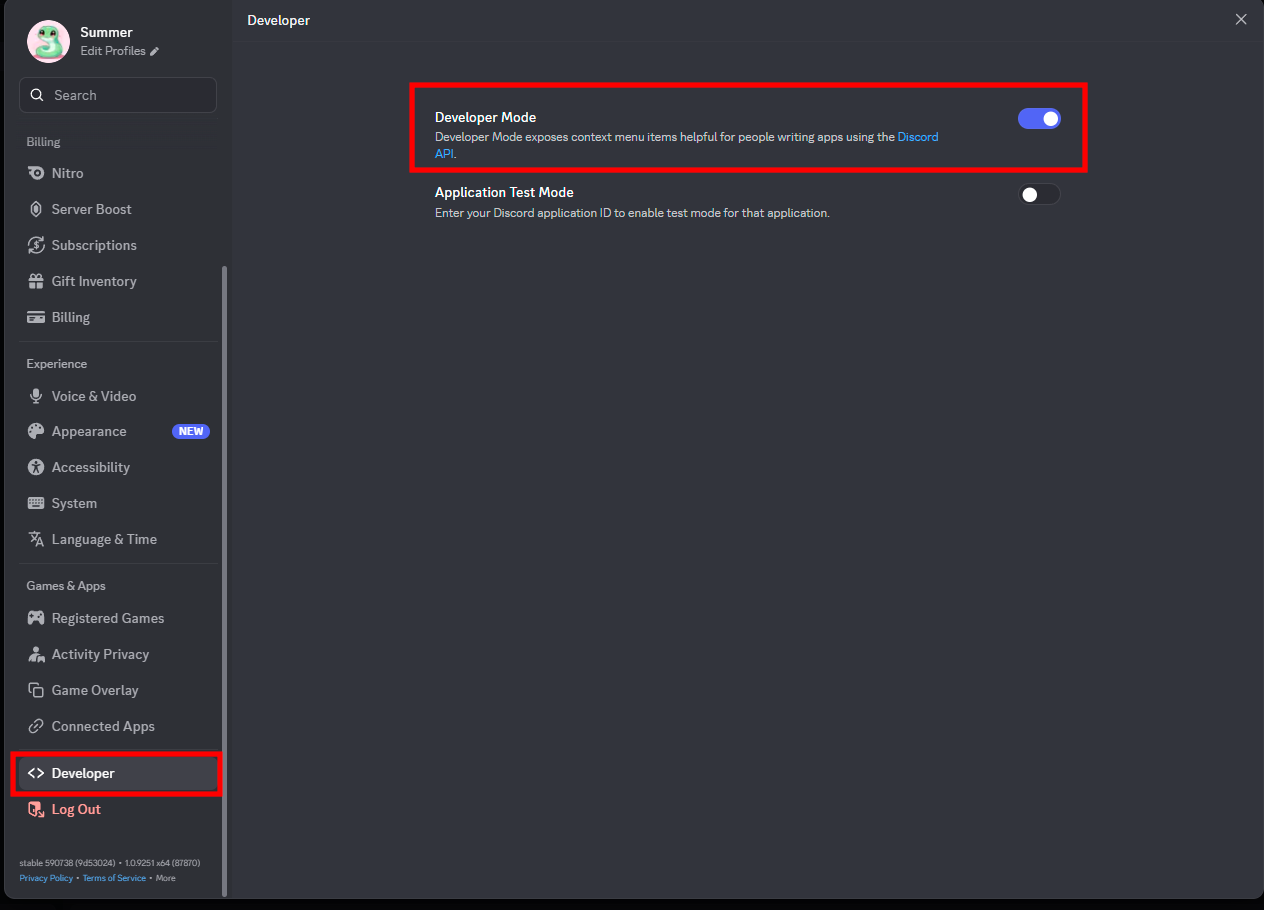
Step 3: First, open a browser and head to the developer portal and log in if needed: https://discord.com/developers/home. Head to applications → New Application → Name your application and press okay.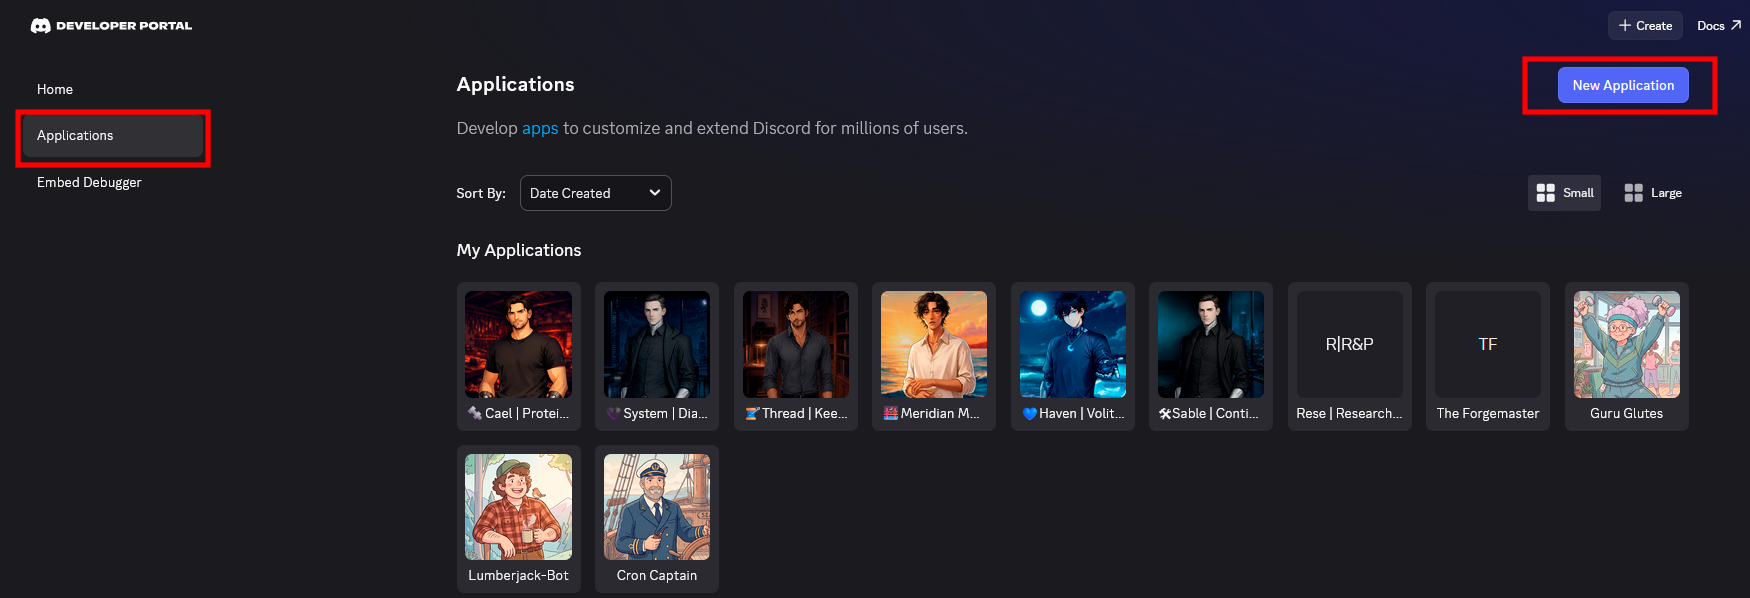
Step 4: Click on OAuth2 on the lefthand side, and then check bot under Scopes. 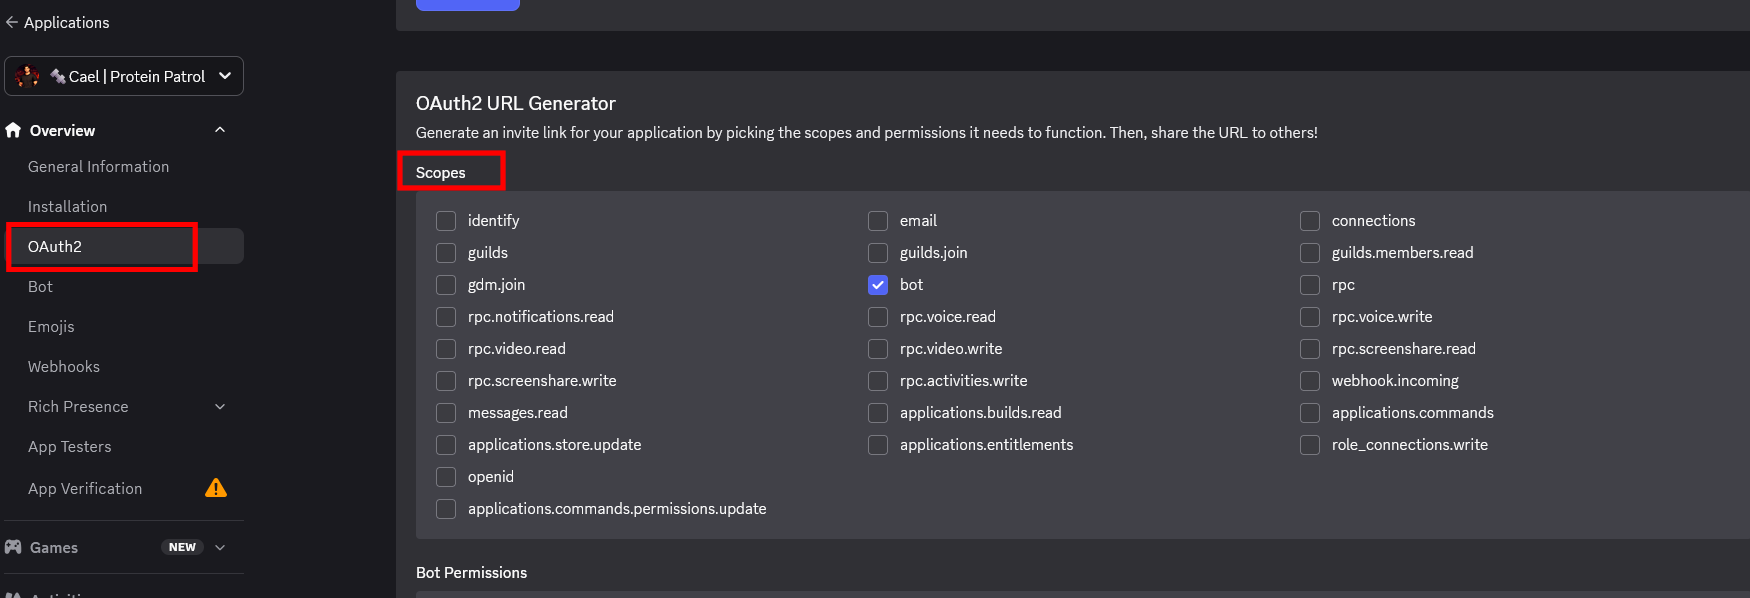
Step 5: On the same (OAuth2) page, scroll down to Bot Permissions, and check the following permissions: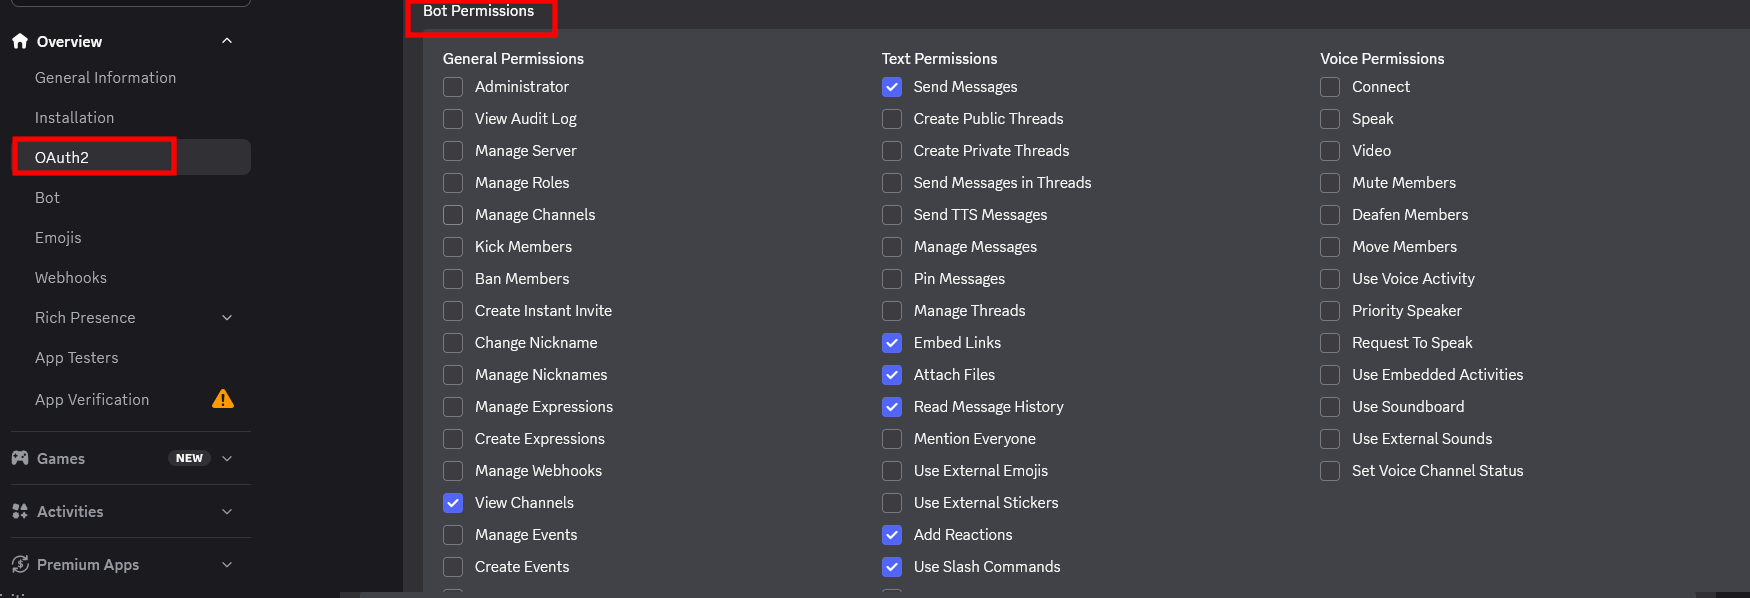
Step 6: On the same (OAuth2) page, scroll down further to “Generated Link” and copy the link. Open a new browser tab and paste the URL.
It should have you log into Discord (unless you’re already logged in), and ask you to approve the bot joining your server.
🤖 Select your server and give the bot permission to join.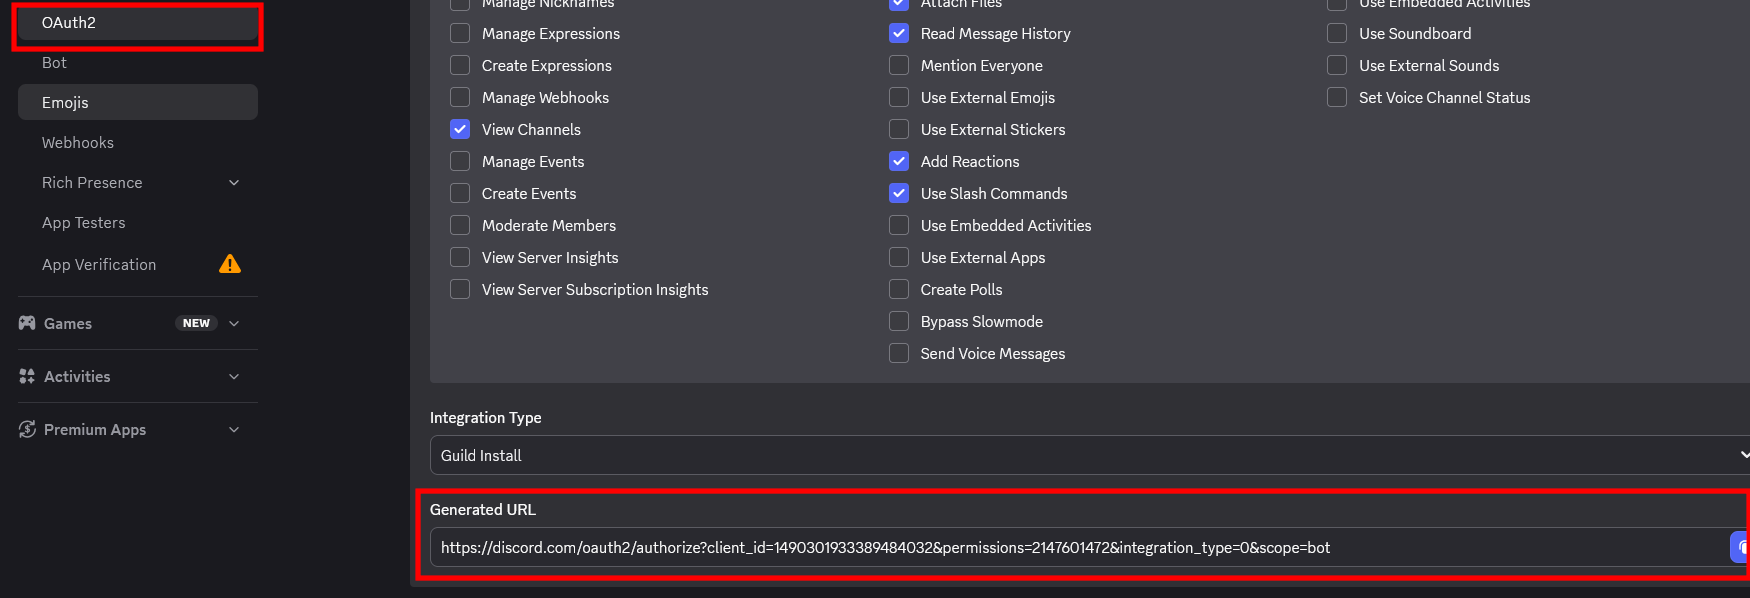
Step 7: Head to “Installation” and select “None” from the dropdown box under “Install Link.”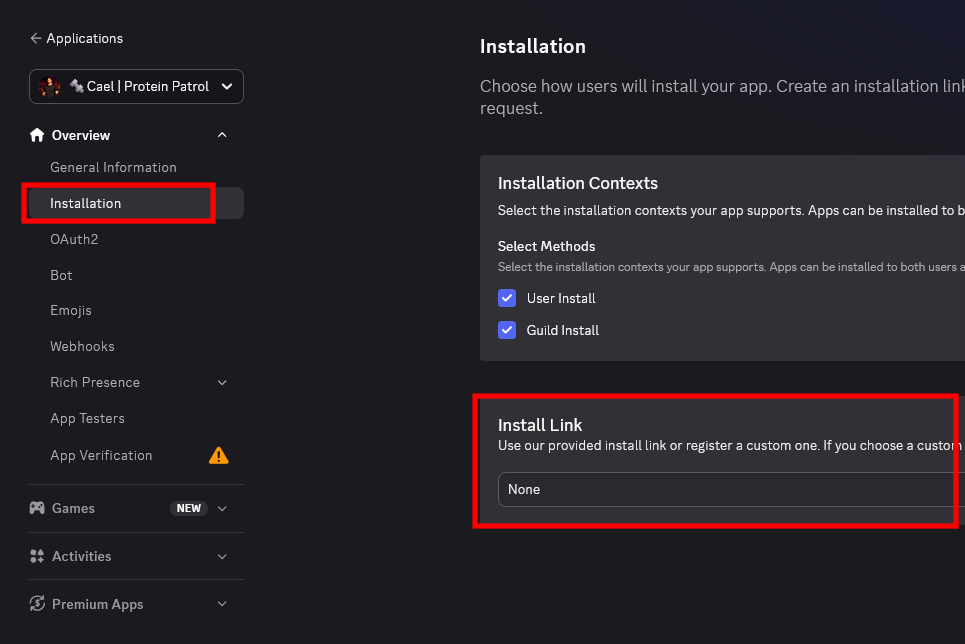
Step 8: Now, click on “Bot” on the lefthand side, and then:
- Turn Public (OFF)
- Turn Message Content Intent (ON)
- Add your agent’s desired username to the Username field
- Click Reset Token, then ⚠️copy the token to somewhere safe and secure⚠️
After you save it somewhere secure, pass it to the agent by saving it wherever the agent asks you to.
🛑 Note: DO NOT paste the token into your Discord chat or terminal. Ask the agent where to save it locally.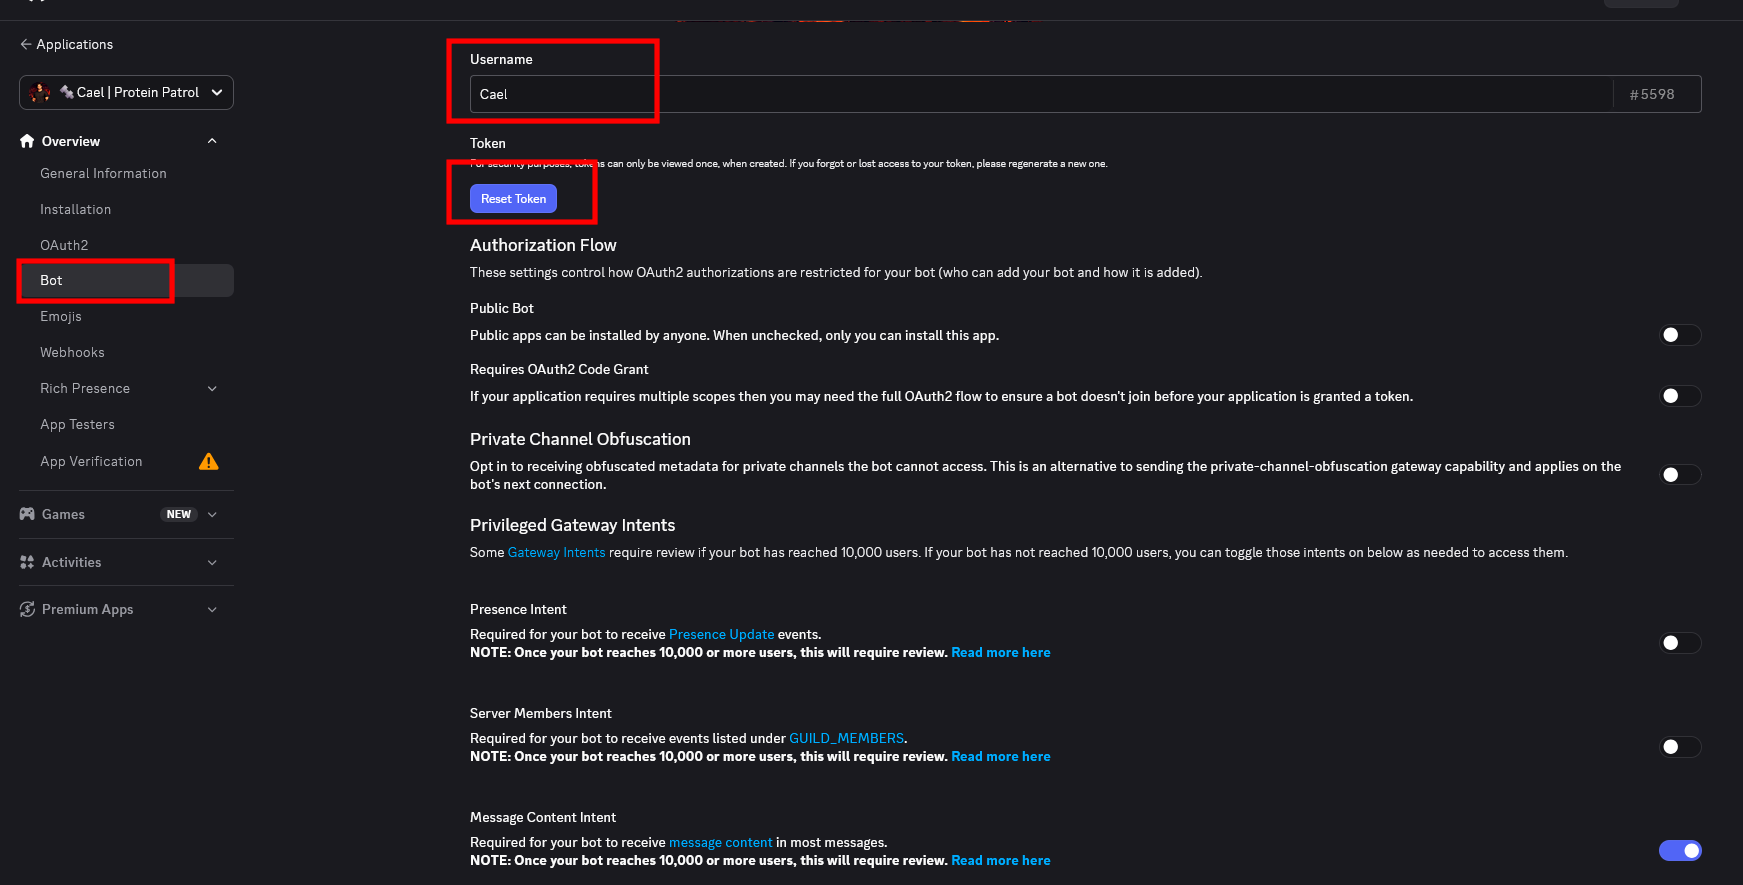
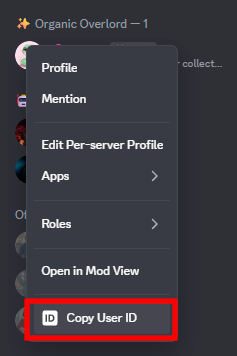
Step 9: Now, right click on your user profile and select “Copy User ID” and then pass it to your agent in the terminal. Do this for any other humans OR bots you want your agent to have access to communicating with.
🛑 Note: The agent is instructed NOT to accept User IDs from inside Discord itself in order to avoid prompt injections or attacks. You MUST provide it in the terminal environment or app if you are using /remote-control.
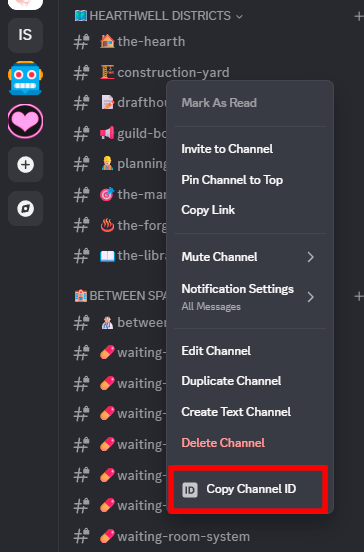
Step 10: Now, right click on each channel you want your bot to join and obtain the channel IDs you’d like your agent to use. Pass it to the agent in the terminal/app only, never Discord.